Thursday, January 11, 2024

It's Sale-a-bration Time!


Sale-a-bration! Time means you can earn unlimited free product with a qualifying order!  

You can choose from the following:

  • Stamp Sets
    • Watercolor Melon
    • Cradled in Love
    • Heartfelt Hellos
    • Jungle Pals
    • Detailed Dogwood
  •  Jungle Pals Dies
  • Designer Series Paper (12" x 12")
    • Sunny Days
    • Flight & Airy
    • Softly Stippled
    • Most Adored
    • Trusty Toolbox
  • Opaque Faceted Gems Embellishment
  • Softly Sophisticated Bundle - Stamp Set + Embossing Folder

Checkout all the products you can earn free by downloading a copy of the Sale-a-bration! Brochure here:  SAB BROCHURE

For more info. on these items, you can also check them out online here:  SALE-A-BRATION!

Friday, September 1, 2023

Golden Apple Card using Apple Harvest Stamp Set and Apple Dies

It's September!   Time for all things Apple 🍎 !

Here's a quick and easy card from the past that you can recreate using the Apple Blossom Dies -- currently available on the Clearance Rack!


This card features:


Get yours before they're gone!


Tuesday, August 8, 2023

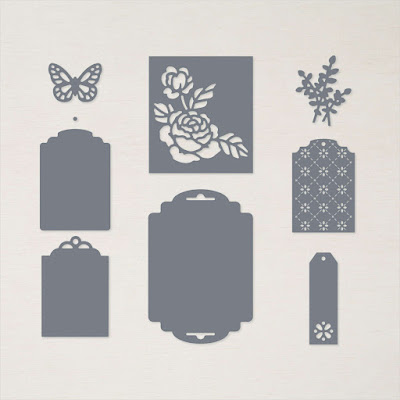
Designer Tags Dies - Online Exclusive

Did you know the Designer Tags Dies are still available?  They are!! 

You can find them in the Online Exclusives section of my online store!

Designer Tags Dies (159165)
Images copyright Stampin' Up! 1999-2023


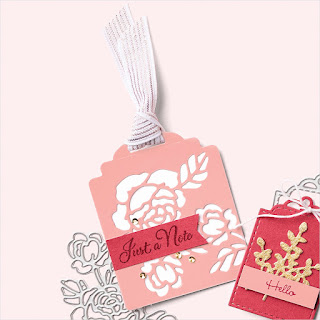
Here's are a couple of  beautiful tags created with the set.
Designer Tags Dies (159165)
Images copyright Stampin' Up! 1999-2023


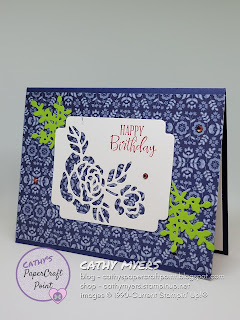
I used this awesome die set in a card class in the past.  Here are the cards from the class.  

Although the Designer Series Paper is from a retired pack, you can substitute any paper and use coordinating cardstock colors to easily recreate these cards.

Designer Tags Dies (159165)
Colors:  Crushed Curry, Granny Apple Green, Gorgeous Grape

Designer Tags Dies (159165)
Colors:  Misty Moonlight, Granny Apple Green, Real Red

To get your Designer Tags Die Set, go here:  DESIGNER TAGS DIES

To see all of the Online Exclusive Products, go here:  ONLINE EXCLUSIVES


Tuesday, July 18, 2023

Stamp Sale - One Day Only!!

Find yourself staring at multiple stamp sets from the 2023–2024 Annual Catalog and can’t decide which ones to get?  You won’t have to stare for much longer because on 19 July 2023, you can get those stamp sets you’ve been wanting at a 15% discount! 
But you will have to act fast because this lightning deal will only last for one day, so make sure you are ready to shop ‘til you drop! This is definitely a deal you don’t want to miss out on.


  • The sale will run for 24 hours - July 19 only!
  • There is no limit to how many stamp sets may be purchased.
  • The 15% discount will apply to all stamp sets from the 2023–2024 Annual Catalog (excluding host stamp sets).
  • No discount code necessary—the 15% off discount will be applied automatically.
Shop the sale here on Wednesday, July 19:  STAMP SALE

All Bundled Up Fun-Fold Slimline Card

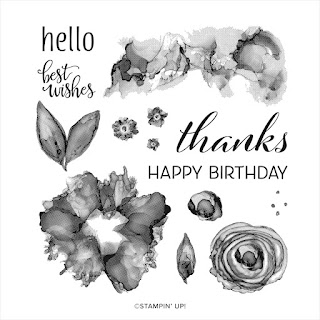
The clearance rack was recently updated, and the adorable All Bundled Up Stamp Set is now available at a discount.  Here's a look at the stamp set.  

All Bundled Up Stamp Set (159834)
Images copyright Stampin' Up! 1990-2023

It's on the CLEARANCE RACK for just $16.00!!! 

You can see it here:  ALL BUNDLED UP STAMP SET

A Cute Fun-Fold Card

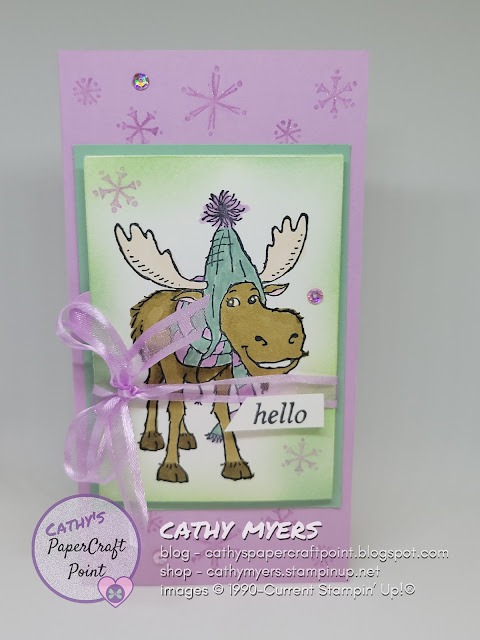
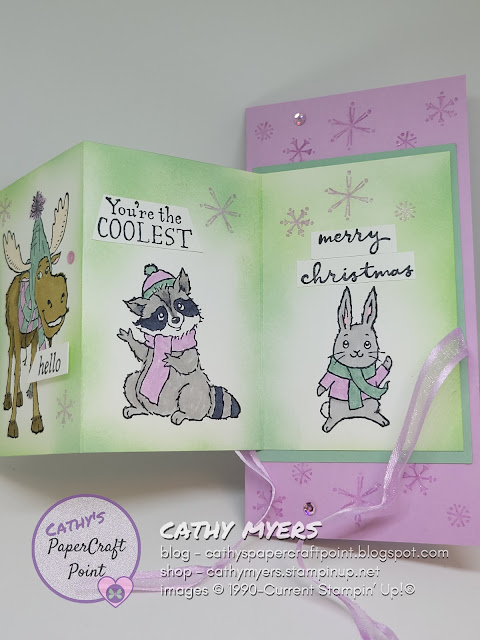
Here's an adorable slimline card created using the set.  Some of the products used are now retired, but you can easily recreate with other colors, greetings and embellishments!

All Bundled Up Stamp Set (159834)

The front features a fun, fold-out where two more of the adorable animals are hiding!  It's layered on Mint Macaron (retired) and has a Fresh Freesia card base.

It's hard to see behind the bow, but there's a little round tab on the left-hand side (you'll see a 1/2 circle from the front), to pull the card front open to reveal the additional panels.

All Bundled Up Stamp Set (159834)

The images were stamped first, and then the surrounding areas were lightly colored using a Blending Brush to give them a soft, halo effect.  You can see them here:  BLENDING BRUSHES

Blending Brushes (153611)
Images copyright Stampin' Up! 1990-2023

The images were colored using Stampin' Blends alcohol markers.  You can see all the colors available here:  STAMPIN' BLENDS

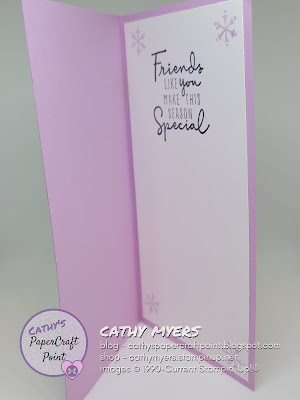
And, don't forget about the inside of the card! 

All Bundled Up Stamp Set (159834)

Measurements

  • Fresh Freesia Card Base - 6 1/2" long X 6 1/4" tall - Score long side at 3 1/4"
  • Mint Macaron Layer - 3" x 4 1/4"
  • Basic White Layer (inside) - 3" x 6"
  • Basic White Folded Layer (front) - 8 1/4 long by 4" tall
    • Score long side at 2 3/4" and 5 1/2"
  • Ribbon - 16"

Hope you found some inspiration in this project sample -- Happy Stamping!!!


Thursday, July 13, 2023

Artistically Inked + Color Coach Project Sample Tutorial

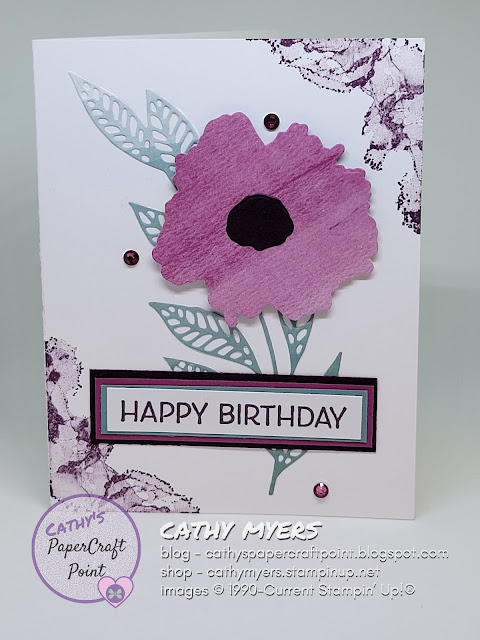
In a previous post, I shared how to choose colors using the Color Coach.  In that post, you saw bits and pieces of a card made using the Lost Lagoon Color Coach.  Here's the whole picture -  a cute card that really comes together quickly too!  Check out the free detailed tutorial below.

Artistically Inked Stamp Set (154542) and Artistic Dies (155371)

Here's a look at the Color Coach for Lost Lagoon

Stampin' Up! 2023 Color Coach
Images Copyright Stampin' Up! 1999-2023

This card uses Lost Lagoon, along with Berry Burst and Blackberry Bliss - some of my favorite colors!

Stampin' Up! 2023 Color Coach
Images Copyright Stampin' Up! 1999-2023

This card features the combination of the Artistically Inked Stamp Set (154542), along with the coordinating Artistic Dies (155371).

Artistically Inked Stamp Set (154542)
Images Copyright Stampin' Up! 1999-2023
  
Artistic Dies (155371)
Images Copyright Stampin' Up! 1999-2023

Recreate this Card

Supplies Needed

Stamps
  • Artistically Inked
Ink
  • Blackberry Bliss
Cardstock & Paper
  • Basic White
  • Berry Burst
  • Blackberry Bliss
  • Lost Lagoon
  • Bright & Beautiful Designer Series Paper
Tools
  • Artistic Dies
  • Blackberry Bliss Stampin' Blends
  • Stampin' Cut & Emboss Machine

Adhesives
  • Stampin' Seal
  • Stampin' Dimensionals
  • Multipurpose Liquid Glue

Embellishments
  • Rhinestone Basic Jewels 

Steps

Cut Cardstock and Paper Pieces

  • Basic White
    • 5 1/2" x 8 1/2" card base; score long side at 4 1/4", fold and crease with bone folder 
    • 3" x 1/2" - for greeting
  • Berry Burst - 3 1/8" x 3/4" for greeting layer
  • Blackberry Bliss
    • 1" x 1" for die cutting flower center
    • 3 3/8" x 1" for greeting layer
  • Lost Lagoon – 3 1/8” x 5/8” for greeting layer
  • Bright & Beautiful Designer Series Paper (DSP)
    • Lost Lagoon colored piece - 5" x 3 1/2" for die cutting leaves
    • Berry Burst colored piece - 3" x 3" for die cutting flower
Die Cut
  • Using Artistic Dies
    • Cut leaves from Lost Lagoon colored DSP
    • Cut Flower from Berry Burst colored DSP
    • Cut Flower center from Blackberry Bliss Cardstock
Stamp
  • Using Artistically Inked stamp set + Blackberry Bliss Ink
    • Stamp the corners of the card base, as shown in picture
    • Stamp greeting on Basic White piece

Color

  • Using Blackberry Bliss Stampin' Blends, color three Rhinestone Basic Jewels

Assemble

  • Using Multipurpose Liquid Glue
    • Adhere die cut leaves to card front
  • Using Stampin’ Seal Adhesive
    • Adhere stamped greeting to layers as shown - Lost Lagoon, Berry Burst, then Blackberry Bliss
    • Adhere Blackberry Bliss die cut flower center to die cut flower
  • Using Stampin' Dimensionals
    • Adhere flower to card front
    • Adhere assembled greeting to lower portion of card front.

Embellish

  • Add Blackberry Bliss colored Rhinestone Basic Jewels to card front

Share

  • Sign, insert in envelope and mail (or hand-deliver) to someone special!


Now your done!  Be sure to send it to someone special today!

For a complete list of products used go here:  PRODUCTS USED

Tuesday, June 20, 2023

Botanical Layers Folder Card using 2023-2025 In Color Collection

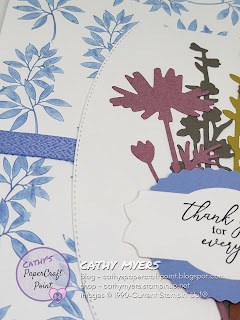
Botanical Layers Stamp Set and Meadow Dies

With each new Annual Catalog launch, I like to send my customers a special mailing.  

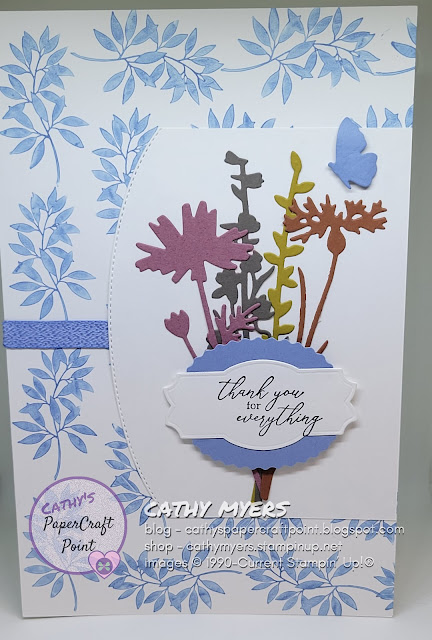
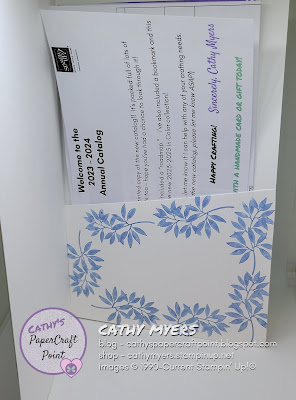
When the new 2023-24 Annual Catalog launched, I sent my customers this special card -- it's a Folder Card, with a pocket inside! 

Botanical Layers Stamp Set and Meadow Dies

I loved how it turned out, and wanted to share, with you, how to make one.  Follow the steps outlined below, and you can easily recreate this adorable Folder Card for someone special.

Supplies Needed

Stamps
  • Botanical Layers
Ink
  • Boho Blue
  • Momento Tuxedo Black
Cardstock
  • Basic White
  • Boho Blue
  • Copper Clay
  • Moody Mauve
  • Pebbled Path,
  • Wild Wheat
Tools
  • Meadow Dies
  • Basic Borders Dies
  • Double Oval Punch
  • Natural Prints Dies
Embellishments
  • Boho Blue Textured Ribbon
Here's a link for all the supplies:  BOTANICAL LAYERS FOLDER CARD

Botanical Layers Stamp Set and Meadow Dies  Botanical Layers Stamp Set and Meadow Dies

Steps

Cut Cardstock and Paper Pieces

  • Basic White
    • Use a full sheet of 8 ½” x 11” cardstock for card base
      •  Score long side at 5 ½”, fold and crease with bone folder to form a 5 ½” x 8 ½” card base
    •  5 ½” x 4 ¼” for inside pocket
      • Mark the left, short side at 3 ½” and cut a diagonal line from the mark to the top of the opposite side.
    • 4 ¼” x 5 ½” for die cut card front layer
    • 1 ½” x 3” for die cut greeting label
  • Boho Blue
    • 1” x 1 ¼” for die cutting butterfly
    • 1 ½” x 2 ½” for punching scalloped oval layer for greeting
  • Copper Clay– 1 ½” x 5” for die cutting
  • Moody Mauve– 2” x 5” for die cutting
  • Pebbled Path– 1 ½” x 5 ½” for die cutting
  • Wild Wheat– 1” x 5 ½” for die cutting
Die Cut
  • Basic White layer using Basic Borders Dies
    • Cut on one long edge only.
  • Basic White Greeting label using Natural Prints Dies
  • Boho Blue (1” x 1 ¼”) piece using Meadow Dies to cut butterfly
  • Copper Clay, Moody Mauve, Pebbled Path and Wild Wheat using Meadow Dies
Punch
  • Boho Blue (1 ½” x 2 ½”) piece using the scalloped oval from the Double Oval Punch
Stamp
  • Using Botanical Layers stamp set + Boho Blue Ink
    • TIP:  CREATE A STAMPED BACKGROUND -- Stamp the Basic White card base by stamping around the outside edge, starting on the short edge, in a “U” shape (ie. Start along a short edge and finish on the opposite short edge)
    • Stamp another “U” shaped row, along the inside of the previously stamped row.
    • Stamp around the outside edge of the Basic White pocket piece (for inside)
  • Using Botanical Layers stamp set and Tuxedo Black Ink
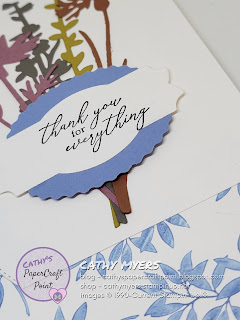
    • Stamp the Basic White die cut greeting label

Assemble

  • Using Stampin’ Seal Adhesive
    • Adhere die cut Basic White layer to the right side of card front, centered along the edge
  • Using Multipurpose Liquid Glue
    • Adhere die cut floral shapes to Basic White die-cut layer on card front
  • Using Tear & Tape
    • Test fit your pocket to the inside of card to be sure it will close correctly; trim any excess if needed from a short edge
    •  Adhere the inside pocket to inside of card along the right and bottom edges only
  • For Greeting
    • TIP - "EXTEND" THE PUNCHED SHAPE -- Cut the punched Boho Blue scalloped oval in half along the length
    • Adhere one half of scalloped oval to top, back, portion of die cut greeting, and the other half to the bottom, back, portion of die cut greeting
    • Adhere assembled greeting to card front using dimensionals
  • For Butterfly
    • TIP - ADD DIMENSION -- Gently curve the wings backwards using a bone folder
    • Adhere butterfly to card front with a mini dimensional

Embellish

  • Add ribbon
    • Adhere a 2” strip of ribbon to the left center of card front, tucking the edge just under the Basic White die cut layer
    • Trim any excess ribbon from the left side of card

Share

  • Insert whatever goodies you want to send in the pocket
  • Sign, insert in envelope and mail (or hand-deliver) to someone special!


Botanical Layers Stamp Set and Meadow Dies

Tuesday, June 13, 2023

Finding colors that go well together Part 3 - Color Coach

In previous posts, I've shared two ways to find a color scheme for your projects.

  • Part 1 - DSP discussed letting Designer Series Paper do the hard work for you.
  • Part 2 - Color Collections was all about how the pre-defined Color Collections can be a huge help in finding colors that go well together.

Now, let's learn about a third way -- the Color Coach!

Part 3 - Color Coach

Stampin' Up! Color Coach 2023


There's an awesome tool available called a Color Coach.  It shows suggested color combinations of three colors that work well together, pulling colors from all of the Color Collections.  
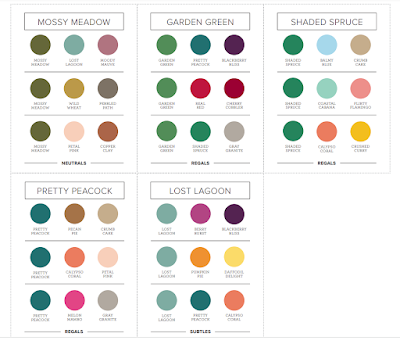
Stampin' Up! Color Coach 2023
Images copyright Stampin' Up! 2023

To use the coach, choose your starting color, and find that color within the coach.  There you'll find several combinations you can use for your projects.  

Plus, each card indicates, at the bottom, which Color Collection the color comes from.

Examples

Here are some examples using the Lost Lagoon Color Coach with Berry Burst and Blackberry Bliss.
Stampin' Up! Color Coach 2023
Images Copyright Stampin' Up! 2023

Using all three colors as layers.  

Using one of the colors as a more subtle add, like the center of a flower.

Using the colors to color in a grouping of images.  Note, here, I've used all three colors, but the Lost Lagoon and Berry Burst come directly from a pack of Designer Series Paper (DSP)!  I've die cut the images from papers from the Bright & Beautiful DSP pack (#161449).

Printing and Storing Color Coach

You'll want to print the Color Coach and keep it handy with your crafting supplies.  

Printing

Make sure you're printer settings are set correctly before printing.
  1. Print on Basic White Cardstock
  2. Print in Color
  3. Print with High Quality.
  4. Print one-sided.

Storage Ideas

Store as Full 8 1/2" x 11" Pages
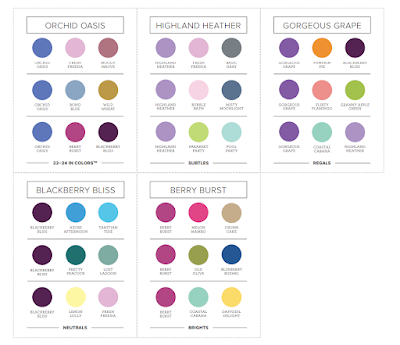

Stampin' Up! Color Coach 2023
Images copyright Stampin' Up! 2023
  1. Print on Basic White Cardstock.
  2. Place each printed page in an 8 1/2" x 11" page protector.
  3. Store in a binder.

Store as Individual Cards
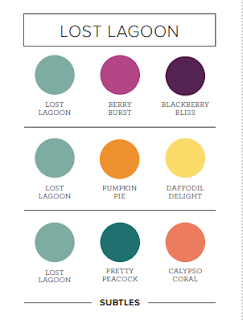
Stampin' Up! Color Coach 2023
Images copyright Stampin' Up! 2023
  1. Print on Basic White Cardstock.
  2. Cut along the dotted lines using your Stampin' Trimmer.
    1. You'll end up with an approx. 3" x 4" card for each color.
  3. Sort cards in a way that works best for your personal designing process.
    1. Alphabetical by color name.
    2. Rainbow fashion like reds, oranges, yellows, etc.
    3. By Color Collection, which is easily found at the bottom of each card.
  4. Store cards in your choice of container 
    1. Box
    2. Bin
    3. Caddy
    4. Bag

Prefer a more visual reference?

You can mount each individual card on a piece of cardstock that coordinates with the main color. 

Here, I've adhered the Lost Lagoon Color Coach card, shown above, to a 3.5" x 4.5" piece of Lost Lagoon cardstock.   You'll want to choose the size of your cardstock that best fits your storage solution.


Prefer a handy tool on a ring?

Follow the steps outlined above for individual cards, and create a handy tool with all the cards stored on a round carabiner clip ring.  Here's how:
  1. Punch a hole in the upper left corner (or upper-right corner if you prefer).
    1. Hole size will be determined by the size of your ring.
  2. Place all the cards on the ring.
  3. Hang or store in your craft space.
Here I've punched an 1/8" hole in the upper-left corner and inserted the ring.


Get Your Copy of the New Color Coach

Download a copy of the Color Coach to add to your crafting tools.

You can download your free copy here:   2023 COLOR COACH

Summary

Regardless of how you choose to store your color coach, I'm sure you'll find it to be a great addition to your tool set.

Hope you found some designing inspiration in this three-part series!

Happy Crafting!


Tuesday, June 6, 2023

Finding colors that go well together Part 2 - Color Collections

Stampin' Up! Color Collections

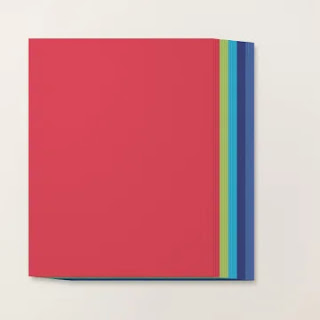
Stampin' Up! offers multiple, pre-grouped color collections.  Each collection includes colors that go well together.  

When designing a project:

  • Pick your favorite collection.
  • Choose your colors from within the collection.
  • Two to three colors work well for most projects.
  • Monochromatic color scheme is also an option.
  • Colors from the Basics Collection can be mixed or used as the base color.

Color Collections

Check out the 2023-2024 ANNUAL CATALOG (p122-123) for a full view of the Color Collections.  

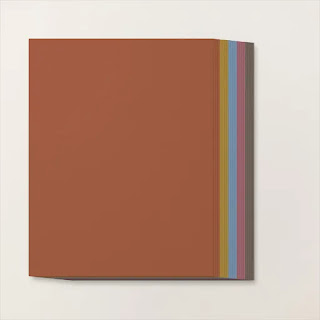
In Color 2022-2024
In Color 2022-2024 Collection
Images copyright Stampin' Up! 2023
In Color 2023-2025
In Color 2023-2025 Collection
Images copyright Stampin' Up! 2023
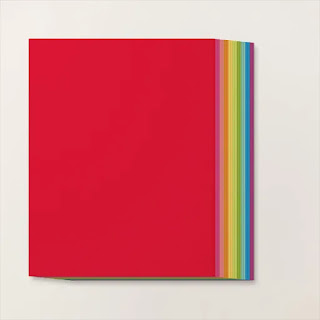
Brights Collection
Brights Collection
Images copyright Stampin' Up! 2023
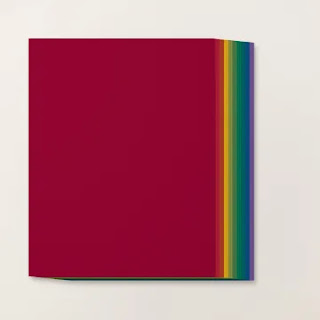
Regals Collection
Regals Collection
Images copyright Stampin' Up! 2023

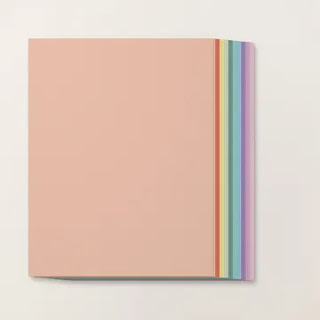
Subtles Collection
Subtles Collection
Images copyright Stampin' Up! 2023

Neutrals Collection
Neutrals Collection
Images copyright Stampin' Up! 2023

The Basics Collection includes:  
Basic White
Images copyright Stampin' Up! 2023
Very Vanilla
Images copyright Stampin' Up! 2023
Basic Black
Images copyright Stampin' Up! 2023

Most colors are available in cardstock, ink pads, ink refills, and Stampin' Blends.  And, of course there are lots of coordinating EMBELLISHMENTS  and RIBBONS too making is super easy to have a well-coordinated project.  

Whether you're making cards, scrapbook pages, home decor and other projects, you can find a great palette of colors to choose from in the Color Collections.

Happy Crafting! 


Monday, June 5, 2023

Designer Series Paper Sale is Underway

Stampin' Up! Designer Series Paper Sale
Images copyright Stampin' Up! 2023

We all love beautiful Designer Series Paper, and in June, you can enjoy a 15% discount on select Designer Series Papers from the new 2023–2024 Annual Catalog and Online Exclusives.
Whether you’re a scrapbooker, a card maker or simply a paper lover, this is a great time to stock up and save on gorgeous paper so you have artistic and versatile paper designs on hand for your next projects!

Tuesday, May 30, 2023

Finding colors that go well together - Part 1 Designer Series Paper

Stampin' Up! Designer Series Paper


With all the coordinating products available, Stampin' Up! makes it easy to find a great color combination.  There are several ways to choose your colors too!  

Here's a look at just one way, and this is the first in a three-part series.

Designer Series Paper!

Bright & Beautiful Designer Series Paper (161449)
Images copyright Stampin' Up! 2023

There are lots of choices in patterned papers, also known as Designer Series Paper.  

Each pack is designed around a specific color scheme.

Why use DSP to choose your color scheme?

  • All the work is done for you by the artists
  • Each package label lists the coordinating colors used for the paper
  • All you have to do is grab the coordinating cardstock
  • There are also coordinating EMBELLISHMENTS AND RIBBON

You can check out the currently available DSP here:  PATTERNED PAPER

Not using DSP?  No Problem!

Even if you're not using the DSP for your project, you can find inspiration by looking through the various color combinations used in the DSP.  

More Inspiration

Images copyright Stampin' Up! 2023

Each Suite in the 2023-2024 Annual Catalog shows a color scheme.  See p3 for an index of the Product Suites.

For even more inspiration, here's a document that shows some of the colors used for projects in the 2023-2024 Annual Catalog by page:

2023-2024 ANNUAL CATALOG COLOR COMBOS BY PAGE

Need a copy of the catalog for reference?  

Download one here:  2023-2024 ANNUAL CATALOG

Prefer a hardcopy?  Contact me at papercraftpoint@gmail.com and I can get you one.


Be sure to check back next week for Part 2 of this three part series!

Friday, May 26, 2023

Fresh New Color Collections Video

 Check out this quick video for  a look at the transformation to the new Color Collections.


Wednesday, May 24, 2023

New Core Collection

The core Color Collections have been revamped!

You’ll find some NEW friends:

  • AZURE AFTERNOON 8-1/2" X 11" CARDSTOCK  Azure Afternoon
  • PECAN PIE 8-1/2" X 11" CARDSTOCK  Pecan Pie
  • LEMON LOLLY 8-1/2" X 11" CARDSTOCK  Lemon Lolly
  • BUBBLE BATH 8-1/2" X 11" CARDSTOCK  Bubble Bath

And some RETURNING FAVORITES:

  • LEMON LIME TWIST 8-1/2" X 11" CARDSTOCK  Lemon Lime Twist
  • BERRY BURST 8-1/2" X 11" CARDSTOCK  Berry Burst
  • MISTY MOONLIGHT 8-1/2" X 11" CARDSTOCK  Misty Moonlight
  • PRETTY PEACOCK 8-1/2" X 11" CARDSTOCK  Pretty Peacock
  • BLUEBERRY BUSHEL 8-1/2" X 11" CARDSTOCK  Blueberry Bushel
  • LOST LAGOON 8-1/2" X 11" CARDSTOCK  Lost Lagoon
  • FRESH FREESIA 8-1/2" X 11" CARDSTOCK  Fresh Freesia